
Figma designs are quite popular, and the major reason behind that is their creativity and ease of use. It is an extremely popular tool as well and used by many people. However, conversion to React Code is sometimes required to make certain technicalities work.
Many people want to convert Figma to React Code, but the steps for it sometimes need more clarity. However, following the steps we mentioned here, you can do it easily.
You have come to the right place, as here we will help you understand how you can convert Figma design to React Code. You can do this simply with Anima’s help, which is extremely handy and an easy-to-use tool.
To achieve this very easily, there is nothing better than Anima, the official Figma partner. You can get the most efficient and relevant Code applicable to any Figma component or screen using Figma’s Dev Mode.
Converting Figma Designs to React Code With Anima
If you want to convert Figma designs to React Code with Anima, there are two ways that you will be able to generate it.
React Code For the Individual Components ( Comes with Read Only Access in Figma)
This is one of the most effective and accessible options for developers, specifically for those wanting reusable React components. You will be able to convert Figma components into React components inside the Figma Dev Mode with ease.
Not only that, this method allows you to generate, inspect, and copy the codes for the components you have selected almost instantly. With just one click, you can download the complete code package or even open the same in the Codesandbox.
React Code For Complete Screen and Full Flows ( Needs Edit Access in Figma)
This method is ideal if you want a React-backed prototype and MVP. It can sync Figma screens and full flows to Anima’s web app. You will get support for breakpoints and Figma links between pages for the export React that you have synced. It needs external syncing along with appropriate code processing.
Method 1 – Generate React Code for Each Component and Screen
Step 1 – The first thing that you need to do is switch to the Dev Mode. You can do this using the toggle right at the top of the Inspect Panel of Figma. Once done, you must tap on the “Plugins” tab.
Step 2- Next, you will need to run the Anima plugin for Dev Mode. If you do not see it on the list, you can just enter “Anima” and search.

Step 3- You can select any of the Figma components, layers, or frames you come across.

Step 4- If you notice the right panel, it will help you get the React and CSS code, which are runnable. You can use the toggle and switch to Tailwind. You can also change between the selected instances of your desktop. It includes all the variants and subcomponents in the full definition.
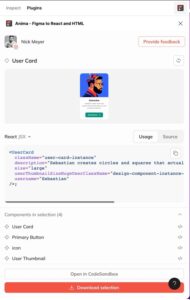
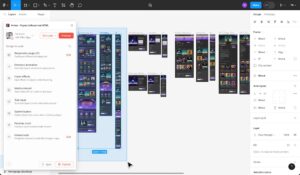
Step 5- Click “Download selection” to get a zip file. It will have all the codes. You can also click “open in Code Sandbox” and run it. It is easy to use and extremely time-efficient if you access it from Sandbox.

Method 2 – Generate React Code For Full Flows
Step 1 – The first thing that you need to do is open the Anima plugin in Figma.
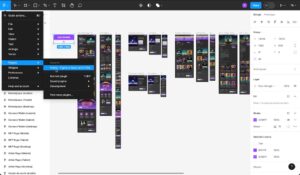
Step 2 – Select the “Turn Design to Code” option once done.
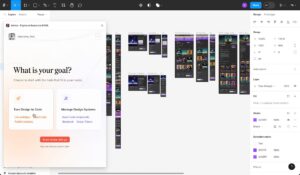
Step 3 – Choose the Figma components. You can choose any screens or flows you want to convert to React. You can select anything from the tab.
Step 4 – At the bottom of the plugin, you will see the option of “Sync.” Tap on that.
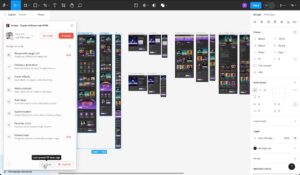
Step 5 – Once the syncing is done, click on the “Go to Anima” option.
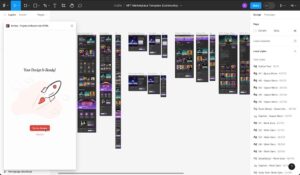
Step 6 – Next, you will be directed to your project in the Anima web app. Here, you will need to select the “< code” icon. This will help you to switch the mode easily.

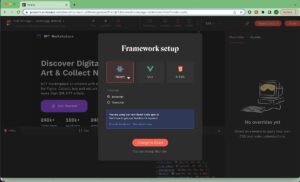
Step 7 – Select “React” from the framework option. You can choose “Javascript” or even “Typescript”. Next, click on the “Change to React” option.
Step 8 – At the top right of the screen, you will see an option that says “Export Code. ” Here, you can download the zip file of your code package. This applies not only to the specific selection but also to the screen or the complete project.
Over To You…
You can use any of the methods we mentioned, as both are quite simple and do not require much effort. However, remember to follow the mentioned steps, or it can get more complicated.
Read more about the productivity of AI tools here.